How to Add Hodhod Live Chat to Your Website, Step by Step
Add Hodhod live chat to any website in minutes: create a website inbox, copy the snippet, paste it into your site, and set the language, theme and waiting queue.
In this article
In this guide you'll set up the Hodhod live chat widget on your website — from creating the inbox in the panel to seeing your first customer message. It takes a few minutes and nothing needs to be installed on your server: you only paste a short snippet into your site.
Before you start
- Admin access to the Hodhod panel. Only account admins can create inboxes.
- A way to edit your site's code or theme. If your site runs on WordPress, the WordPress guide is even simpler.
Step 1: Create a website inbox
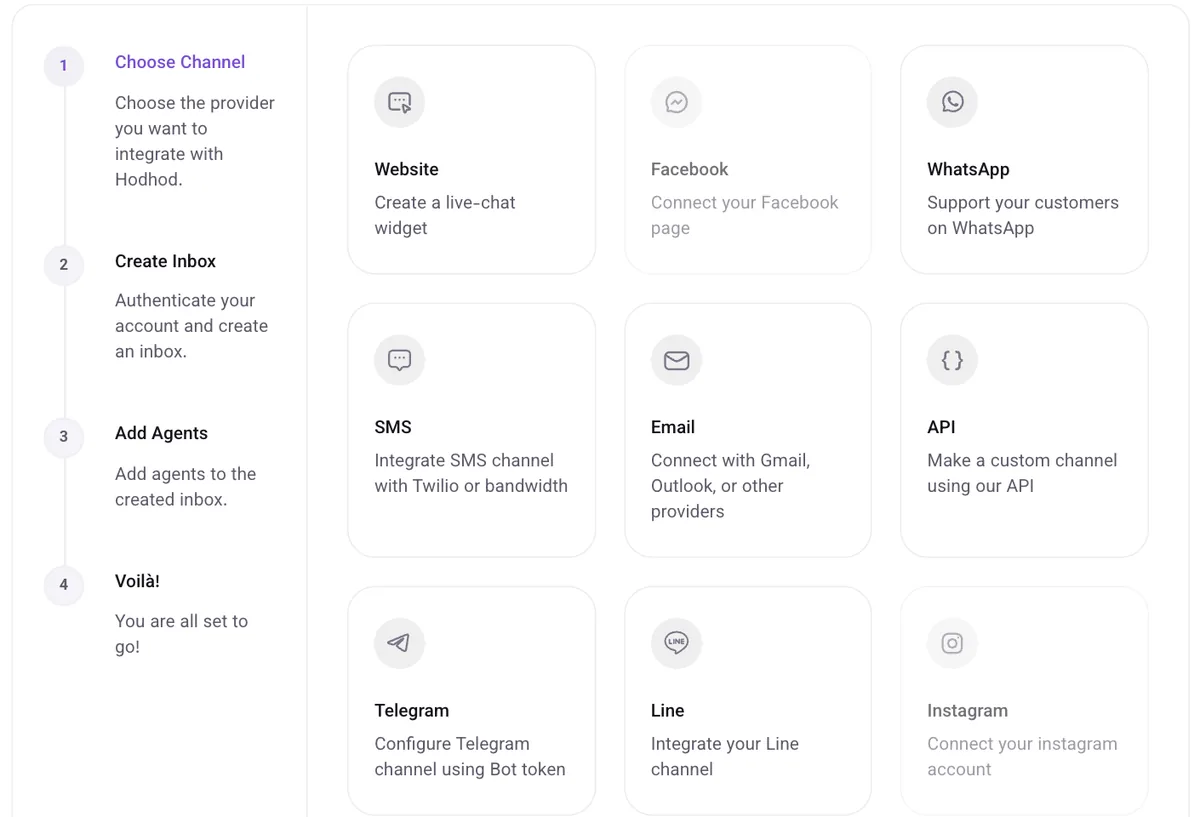
In the panel, go to Settings → Inboxes and click "Add Inbox". From the list of channels, choose "Website" (Create a live-chat widget).
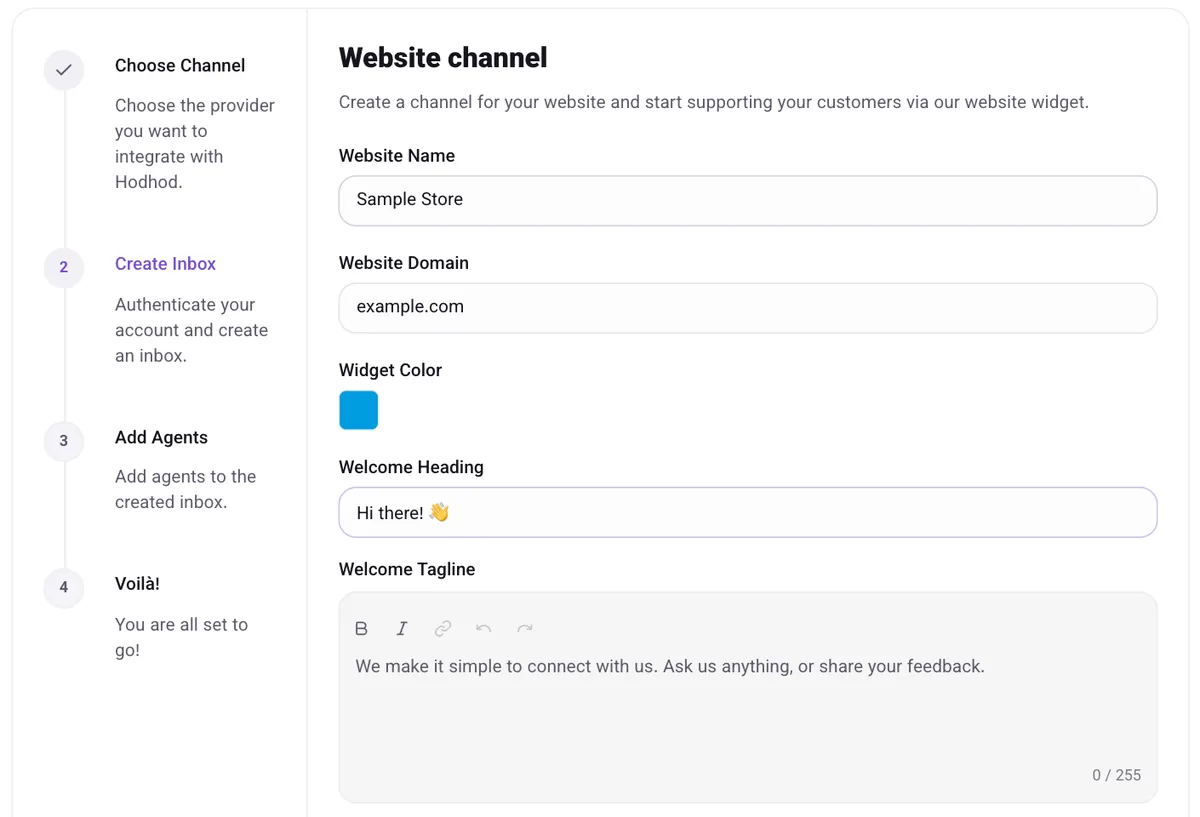
Step 2: Fill in the "Website channel" form
- Website Name: the name customers see at the top of the widget — your store or brand name, for example.
- Website Domain: the domain the widget will run on, such as example.com.
- Widget Color: pick your brand color so the widget looks like part of your site.
- Welcome Heading and Welcome Tagline: the text customers see on the widget's first screen.
- Enable channel greeting (optional): a message sent automatically when a conversation starts.
Then click "Create inbox".
Step 3: Add agents to the inbox
Next, pick the people who should answer this website's conversations under "Pick agents for the inbox" and click "Add agents". Only agents added here can see this inbox's messages — if you want to answer too, add yourself.
Step 4: Copy the snippet
The "Your Inbox is ready!" screen shows the installation snippet. Click "Copy".
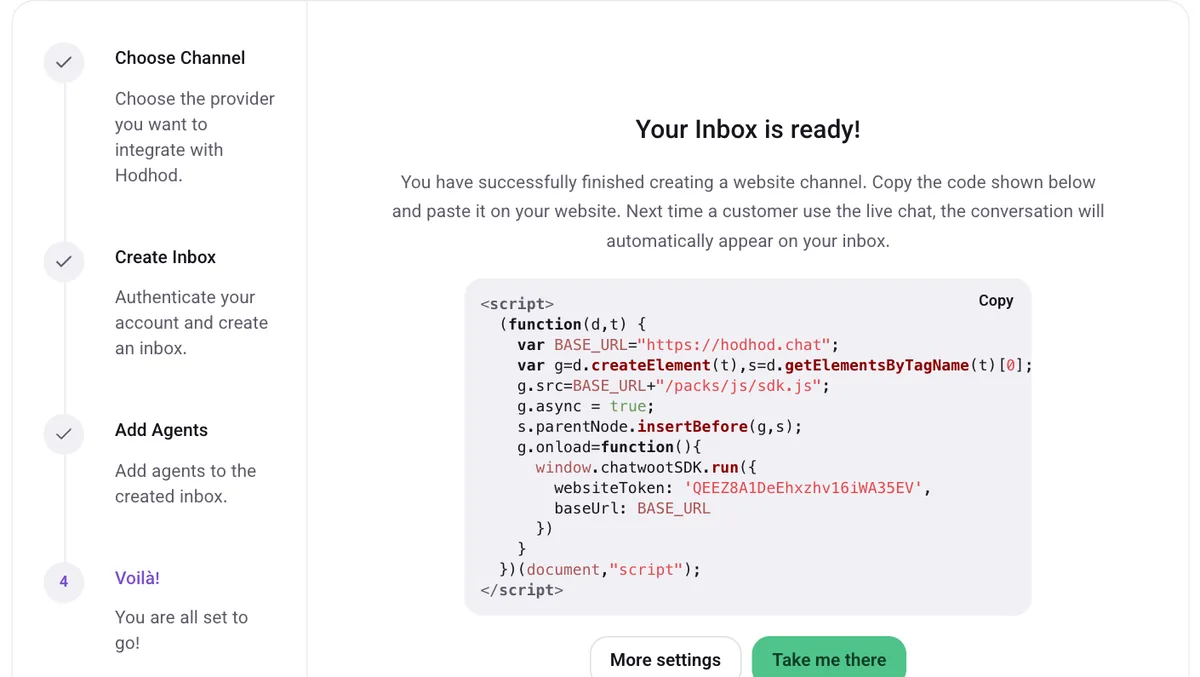
The snippet looks like this, except that the websiteToken value is unique to your inbox — so always copy the code from your own panel:
<script>
  (function(d,t) {
    var BASE_URL="https://hodhod.chat";
    var g=d.createElement(t),s=d.getElementsByTagName(t)[0];
    g.src=BASE_URL+"/packs/js/sdk.js";
    g.async = true;
    s.parentNode.insertBefore(g,s);
    g.onload=function(){
      window.chatwootSDK.run({
        websiteToken: 'YOUR_WEBSITE_TOKEN',
        baseUrl: BASE_URL
      })
    }
  })(document,"script");
</script>
Need the code again later? Open the inbox, find the widget preview on the "Settings" tab and switch it to "Script".
Step 5: Paste the code into your site
Paste the code just before the closing </body> tag in your site's main template, so it loads on every page:
- Plain HTML site: in each page, or in your shared footer if you have one.
- PHP templates: usually
footer.phpor your main layout file. - Single-page apps (React, Vue, etc.): once in
index.html, not inside components. - WordPress: see the separate WordPress guide.
- Shopify, Wix, Squarespace, Webflow or Google Tag Manager: see the site builders guide.
The snippet loads asynchronously, so it doesn't block your page from rendering.
Step 6: Test it
Open your site (ideally in a private browser window). The chat button should appear in the bottom corner. Send a test message and check that it arrives under "Conversations" in the panel. That's it — your widget is live.
Recommended settings after installing
Match the widget's language and theme to your site
By default, the widget uses your account's language and follows the visitor's system light/dark setting. To match your site exactly, add this before the main snippet:
<script>
  window.chatwootSettings = {
    locale: 'en',
    darkMode: 'auto',
  };
</script>
localeis the widget language — for exampleenon English pages andfaon Persian pages.darkModecan belight,darkorauto.- If your site has its own theme or language switcher, call
window.$chatwoot.setColorScheme('dark')orwindow.$chatwoot.setLocale('fa')when it changes, so the widget follows immediately.
Show the queue and estimated wait time
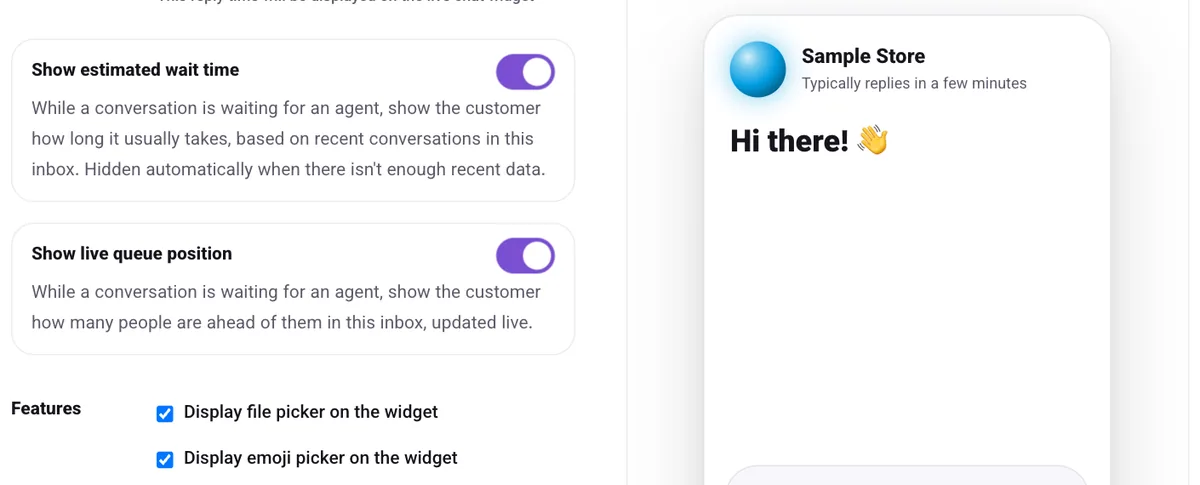
In the inbox, on the "Settings" tab under "Widget features", turn on "Show estimated wait time" and "Show live queue position". Waiting customers then see how many people are ahead of them and roughly how long they'll wait. The estimate only appears when the inbox has enough recent data to make it meaningful.
A few more settings worth a look
- "Business Hours" tab: set your team's hours so customers know when to expect a reply outside them.
- "Pre Chat Form" tab: ask for a name, email or phone number before the chat starts, if you need it (what to ask).
- "CSAT" tab: turn on the post-chat satisfaction survey; you can add follow-up questions too.
- "Configuration" tab → "Allowed Domains": make sure the widget only runs on your own domains.
- "Enable email collect box" on the "Settings" tab: so customers who leave the page still get the answer by email.
If the widget doesn't show up
- Clear your cache. Caching plugins or a CDN may be serving an old version of the page.
- Check where the code is. It must be in a template that loads on every page.
- Check Allowed Domains. If you set a list, your site's domain (and subdomains, if needed) must be on it.
- Look at the browser console. Press F12, open the console and look for errors. If you use an ad blocker, try once without it.
Still stuck? Message us from the widget at the bottom of this page.
Frequently asked questions
Do I need a developer to install it?
No. You only need to be able to paste a snippet into your site's template. On WordPress you don't even need to edit files — a plugin does it.
Will the widget slow down my site?
The Hodhod snippet loads asynchronously, which means it doesn't block your page content from rendering. To be sure, measure your page in PageSpeed Insights before and after installing.
Can I put the widget on several websites?
Yes. We recommend creating a separate website inbox for each site, so conversations stay apart and each site has its own name, color and settings.
Where do I find the installation code later?
Open the inbox under Settings → Inboxes; on the "Settings" tab, switch the widget preview to "Script".